
AUDO CPH Reverse Table Lamp


AUDO CPH Reverse Table Lamp
test1{"id":8702887199000,"title":"AUDO CPH Reverse Table Lamp","handle":"menu-reverse-table-lamp","description":"\u003cp\u003eThe stunning Reverse Lamp by Menu blends travertine with aluminium to present a table lamp like no other.\u003c\/p\u003e\n\u003cp\u003eIn his search for simple and clever solutions in any given space, Danish designer Aleksandar Lazic looked to Italian marble tables from the 1970s when creating the Reverse Lamp. Inspired by the play on structure created by geometric constraints, the conical travertine base and curved, bronzed aluminium shade define the lamp’s perfectly balanced expression.\u003c\/p\u003e\n\u003cp\u003eThe light diffuses evenly across the unworked stone, left raw for the light to highlight its natural imperfections, revealing shadows and an intriguing colour play stemming from the base itself. At precisely the point at which the shade and base meet sits a dimmer switch for adjusting the light intensity.\u003c\/p\u003e\n\u003cp\u003eFitted with a dim-to-warm LED light source, the Reverse Lamp casts warm light on a bedside table or subdued light on a cabinet surface, making it an elegant and characterful solution to a multitude of lighting needs.\u003c\/p\u003e\n\u003cp\u003e\u003cstrong\u003eProduct information\u003c\/strong\u003e\u003cbr\u003e\nDimensions: (H) 30 cm, Ø 24\/10 cm\u003cbr\u003e\nCord: 200cm\u003cbr\u003e\nDimming: Controlled on top of shade, dim-to-warm, 2200k - 3000k, 560lm Max\u003cbr\u003e\nElectrical: 6W LED Panel, CRI \u0026gt;85\u003cbr\u003e\nMaterials: Travertine stone, Aluminum, PMMA diffuser, Adapter\u003c\/p\u003e\n\u003cp\u003e\u003cstrong\u003eMENU and BY LASSEN\u003c\/strong\u003e, two prestigious design houses have united to create a brand new luxury brand, \u003cstrong\u003eAUDO COPENHAGEN\u003c\/strong\u003e. Read more about the rebranding here: https:\/\/www.designstuff.com.au\/blog\/audo-copenhagen-launches\/\u003c\/p\u003e\n\u003cp\u003e\u003cstrong\u003eAdditional resources:\u003c\/strong\u003e\u003cbr\u003e\n\u003cu\u003e\u003ca href=\"https:\/\/www.designstuff.com.au\/wp-content\/uploads\/2022\/02\/PFS_Reverse_Table_Lamp.pdf\" target=\"_blank\" rel=\"noopener\"\u003eProduct Fact Sheet\u003c\/a\u003e\u003c\/u\u003e\u003c\/p\u003e","published_at":"2021-03-03T12:54:16+11:00","created_at":"2023-09-26T17:22:35+10:00","vendor":"Audo CPH","type":"","tags":[],"price":132990,"price_min":132990,"price_max":132990,"available":true,"price_varies":false,"compare_at_price":166990,"compare_at_price_min":166990,"compare_at_price_max":166990,"compare_at_price_varies":false,"variants":[{"id":46868926824728,"title":"Default Title","option1":"Default Title","option2":null,"option3":null,"sku":"12596","requires_shipping":true,"taxable":true,"featured_image":null,"available":true,"name":"AUDO CPH Reverse Table Lamp","public_title":null,"options":["Default Title"],"price":132990,"weight":2000,"compare_at_price":166990,"inventory_management":"shopify","barcode":"5709262136032","requires_selling_plan":false,"selling_plan_allocations":[],"quantity_rule":{"min":1,"max":null,"increment":1}}],"images":["\/\/designstuff.com.au\/cdn\/shop\/files\/AUDO-CPH-Reverse-Table-Lamp.jpg?v=1747885026","\/\/designstuff.com.au\/cdn\/shop\/files\/AUDO-CPH-Reverse-Table-Lamp_1.jpg?v=1747885027","\/\/designstuff.com.au\/cdn\/shop\/files\/AUDO-CPH-Reverse-Table-Lamp_2.jpg?v=1747885027","\/\/designstuff.com.au\/cdn\/shop\/files\/AUDO-CPH-Reverse-Table-Lamp_3.jpg?v=1747885027","\/\/designstuff.com.au\/cdn\/shop\/files\/AUDO-CPH-Reverse-Table-Lamp_4.jpg?v=1747885027","\/\/designstuff.com.au\/cdn\/shop\/files\/AUDO-CPH-Reverse-Table-Lamp_5.jpg?v=1747885027","\/\/designstuff.com.au\/cdn\/shop\/files\/AUDO-CPH-Reverse-Table-Lamp_6.jpg?v=1747885027","\/\/designstuff.com.au\/cdn\/shop\/files\/Designstuff_MENU__Table_Reverse_Table_Lamp_4-e1614737423640.jpg?v=1747885027","\/\/designstuff.com.au\/cdn\/shop\/files\/Designstuff_MENU__Table_Reverse_Table_Lamp_3.jpg?v=1747885027","\/\/designstuff.com.au\/cdn\/shop\/files\/Designstuff_MENU__Table_Reverse_Table_Lamp_9.jpg?v=1747885027","\/\/designstuff.com.au\/cdn\/shop\/files\/Designstuff_MENU__Table_Reverse_Table_Lamp_7.jpg?v=1747885028","\/\/designstuff.com.au\/cdn\/shop\/files\/Designstuff_MENU__Table_Reverse_Table_Lamp_2.jpg?v=1747885028","\/\/designstuff.com.au\/cdn\/shop\/files\/Designstuff_MENU__Table_Reverse_Table_Lamp_1.jpg?v=1747885028","\/\/designstuff.com.au\/cdn\/shop\/files\/Designstuff_MENU__Table_Reverse_Table_Lamp_8.jpg?v=1747885028"],"featured_image":"\/\/designstuff.com.au\/cdn\/shop\/files\/AUDO-CPH-Reverse-Table-Lamp.jpg?v=1747885026","options":["Title"],"media":[{"alt":null,"id":36538881802520,"position":1,"preview_image":{"aspect_ratio":1.0,"height":1000,"width":1000,"src":"\/\/designstuff.com.au\/cdn\/shop\/files\/AUDO-CPH-Reverse-Table-Lamp.jpg?v=1747885026"},"aspect_ratio":1.0,"height":1000,"media_type":"image","src":"\/\/designstuff.com.au\/cdn\/shop\/files\/AUDO-CPH-Reverse-Table-Lamp.jpg?v=1747885026","width":1000},{"alt":null,"id":36538881835288,"position":2,"preview_image":{"aspect_ratio":1.0,"height":1000,"width":1000,"src":"\/\/designstuff.com.au\/cdn\/shop\/files\/AUDO-CPH-Reverse-Table-Lamp_1.jpg?v=1747885027"},"aspect_ratio":1.0,"height":1000,"media_type":"image","src":"\/\/designstuff.com.au\/cdn\/shop\/files\/AUDO-CPH-Reverse-Table-Lamp_1.jpg?v=1747885027","width":1000},{"alt":null,"id":36538881868056,"position":3,"preview_image":{"aspect_ratio":1.0,"height":1000,"width":1000,"src":"\/\/designstuff.com.au\/cdn\/shop\/files\/AUDO-CPH-Reverse-Table-Lamp_2.jpg?v=1747885027"},"aspect_ratio":1.0,"height":1000,"media_type":"image","src":"\/\/designstuff.com.au\/cdn\/shop\/files\/AUDO-CPH-Reverse-Table-Lamp_2.jpg?v=1747885027","width":1000},{"alt":null,"id":36538881900824,"position":4,"preview_image":{"aspect_ratio":1.0,"height":1000,"width":1000,"src":"\/\/designstuff.com.au\/cdn\/shop\/files\/AUDO-CPH-Reverse-Table-Lamp_3.jpg?v=1747885027"},"aspect_ratio":1.0,"height":1000,"media_type":"image","src":"\/\/designstuff.com.au\/cdn\/shop\/files\/AUDO-CPH-Reverse-Table-Lamp_3.jpg?v=1747885027","width":1000},{"alt":null,"id":36538881933592,"position":5,"preview_image":{"aspect_ratio":1.0,"height":1000,"width":1000,"src":"\/\/designstuff.com.au\/cdn\/shop\/files\/AUDO-CPH-Reverse-Table-Lamp_4.jpg?v=1747885027"},"aspect_ratio":1.0,"height":1000,"media_type":"image","src":"\/\/designstuff.com.au\/cdn\/shop\/files\/AUDO-CPH-Reverse-Table-Lamp_4.jpg?v=1747885027","width":1000},{"alt":null,"id":36538881966360,"position":6,"preview_image":{"aspect_ratio":1.0,"height":1000,"width":1000,"src":"\/\/designstuff.com.au\/cdn\/shop\/files\/AUDO-CPH-Reverse-Table-Lamp_5.jpg?v=1747885027"},"aspect_ratio":1.0,"height":1000,"media_type":"image","src":"\/\/designstuff.com.au\/cdn\/shop\/files\/AUDO-CPH-Reverse-Table-Lamp_5.jpg?v=1747885027","width":1000},{"alt":null,"id":36538881999128,"position":7,"preview_image":{"aspect_ratio":1.0,"height":1000,"width":1000,"src":"\/\/designstuff.com.au\/cdn\/shop\/files\/AUDO-CPH-Reverse-Table-Lamp_6.jpg?v=1747885027"},"aspect_ratio":1.0,"height":1000,"media_type":"image","src":"\/\/designstuff.com.au\/cdn\/shop\/files\/AUDO-CPH-Reverse-Table-Lamp_6.jpg?v=1747885027","width":1000},{"alt":null,"id":35455458378008,"position":8,"preview_image":{"aspect_ratio":1.0,"height":1100,"width":1100,"src":"\/\/designstuff.com.au\/cdn\/shop\/files\/Designstuff_MENU__Table_Reverse_Table_Lamp_4-e1614737423640.jpg?v=1747885027"},"aspect_ratio":1.0,"height":1100,"media_type":"image","src":"\/\/designstuff.com.au\/cdn\/shop\/files\/Designstuff_MENU__Table_Reverse_Table_Lamp_4-e1614737423640.jpg?v=1747885027","width":1100},{"alt":null,"id":35455458410776,"position":9,"preview_image":{"aspect_ratio":0.75,"height":1700,"width":1275,"src":"\/\/designstuff.com.au\/cdn\/shop\/files\/Designstuff_MENU__Table_Reverse_Table_Lamp_3.jpg?v=1747885027"},"aspect_ratio":0.75,"height":1700,"media_type":"image","src":"\/\/designstuff.com.au\/cdn\/shop\/files\/Designstuff_MENU__Table_Reverse_Table_Lamp_3.jpg?v=1747885027","width":1275},{"alt":null,"id":35455458443544,"position":10,"preview_image":{"aspect_ratio":0.75,"height":1700,"width":1275,"src":"\/\/designstuff.com.au\/cdn\/shop\/files\/Designstuff_MENU__Table_Reverse_Table_Lamp_9.jpg?v=1747885027"},"aspect_ratio":0.75,"height":1700,"media_type":"image","src":"\/\/designstuff.com.au\/cdn\/shop\/files\/Designstuff_MENU__Table_Reverse_Table_Lamp_9.jpg?v=1747885027","width":1275},{"alt":null,"id":35455458476312,"position":11,"preview_image":{"aspect_ratio":0.75,"height":1700,"width":1275,"src":"\/\/designstuff.com.au\/cdn\/shop\/files\/Designstuff_MENU__Table_Reverse_Table_Lamp_7.jpg?v=1747885028"},"aspect_ratio":0.75,"height":1700,"media_type":"image","src":"\/\/designstuff.com.au\/cdn\/shop\/files\/Designstuff_MENU__Table_Reverse_Table_Lamp_7.jpg?v=1747885028","width":1275},{"alt":null,"id":35455458509080,"position":12,"preview_image":{"aspect_ratio":0.75,"height":1700,"width":1275,"src":"\/\/designstuff.com.au\/cdn\/shop\/files\/Designstuff_MENU__Table_Reverse_Table_Lamp_2.jpg?v=1747885028"},"aspect_ratio":0.75,"height":1700,"media_type":"image","src":"\/\/designstuff.com.au\/cdn\/shop\/files\/Designstuff_MENU__Table_Reverse_Table_Lamp_2.jpg?v=1747885028","width":1275},{"alt":null,"id":35455458541848,"position":13,"preview_image":{"aspect_ratio":0.75,"height":1700,"width":1275,"src":"\/\/designstuff.com.au\/cdn\/shop\/files\/Designstuff_MENU__Table_Reverse_Table_Lamp_1.jpg?v=1747885028"},"aspect_ratio":0.75,"height":1700,"media_type":"image","src":"\/\/designstuff.com.au\/cdn\/shop\/files\/Designstuff_MENU__Table_Reverse_Table_Lamp_1.jpg?v=1747885028","width":1275},{"alt":null,"id":35455458574616,"position":14,"preview_image":{"aspect_ratio":0.75,"height":1700,"width":1275,"src":"\/\/designstuff.com.au\/cdn\/shop\/files\/Designstuff_MENU__Table_Reverse_Table_Lamp_8.jpg?v=1747885028"},"aspect_ratio":0.75,"height":1700,"media_type":"image","src":"\/\/designstuff.com.au\/cdn\/shop\/files\/Designstuff_MENU__Table_Reverse_Table_Lamp_8.jpg?v=1747885028","width":1275}],"requires_selling_plan":false,"selling_plan_groups":[],"content":"\u003cp\u003eThe stunning Reverse Lamp by Menu blends travertine with aluminium to present a table lamp like no other.\u003c\/p\u003e\n\u003cp\u003eIn his search for simple and clever solutions in any given space, Danish designer Aleksandar Lazic looked to Italian marble tables from the 1970s when creating the Reverse Lamp. Inspired by the play on structure created by geometric constraints, the conical travertine base and curved, bronzed aluminium shade define the lamp’s perfectly balanced expression.\u003c\/p\u003e\n\u003cp\u003eThe light diffuses evenly across the unworked stone, left raw for the light to highlight its natural imperfections, revealing shadows and an intriguing colour play stemming from the base itself. At precisely the point at which the shade and base meet sits a dimmer switch for adjusting the light intensity.\u003c\/p\u003e\n\u003cp\u003eFitted with a dim-to-warm LED light source, the Reverse Lamp casts warm light on a bedside table or subdued light on a cabinet surface, making it an elegant and characterful solution to a multitude of lighting needs.\u003c\/p\u003e\n\u003cp\u003e\u003cstrong\u003eProduct information\u003c\/strong\u003e\u003cbr\u003e\nDimensions: (H) 30 cm, Ø 24\/10 cm\u003cbr\u003e\nCord: 200cm\u003cbr\u003e\nDimming: Controlled on top of shade, dim-to-warm, 2200k - 3000k, 560lm Max\u003cbr\u003e\nElectrical: 6W LED Panel, CRI \u0026gt;85\u003cbr\u003e\nMaterials: Travertine stone, Aluminum, PMMA diffuser, Adapter\u003c\/p\u003e\n\u003cp\u003e\u003cstrong\u003eMENU and BY LASSEN\u003c\/strong\u003e, two prestigious design houses have united to create a brand new luxury brand, \u003cstrong\u003eAUDO COPENHAGEN\u003c\/strong\u003e. Read more about the rebranding here: https:\/\/www.designstuff.com.au\/blog\/audo-copenhagen-launches\/\u003c\/p\u003e\n\u003cp\u003e\u003cstrong\u003eAdditional resources:\u003c\/strong\u003e\u003cbr\u003e\n\u003cu\u003e\u003ca href=\"https:\/\/www.designstuff.com.au\/wp-content\/uploads\/2022\/02\/PFS_Reverse_Table_Lamp.pdf\" target=\"_blank\" rel=\"noopener\"\u003eProduct Fact Sheet\u003c\/a\u003e\u003c\/u\u003e\u003c\/p\u003e"}
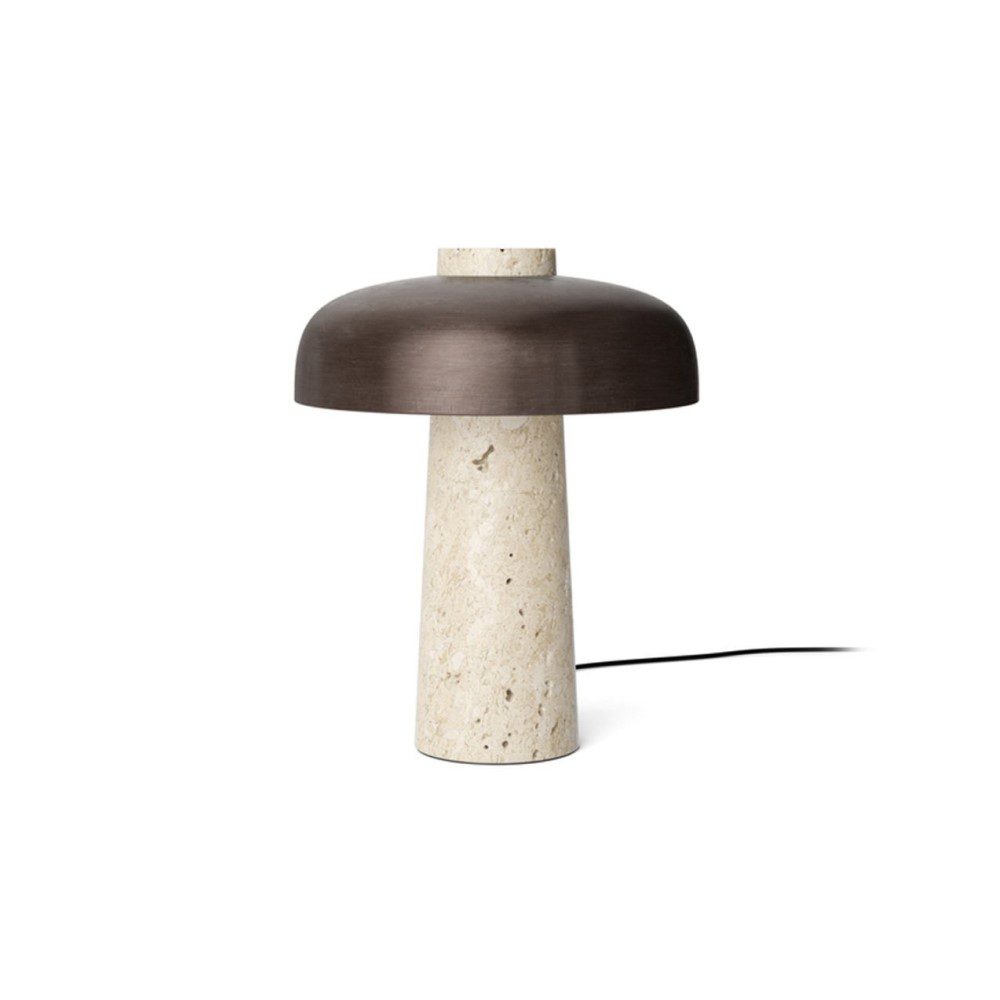
$1,329.90 $1,329.90The stunning Reverse Lamp by Menu blends travertine with aluminium to present a table lamp like no other.
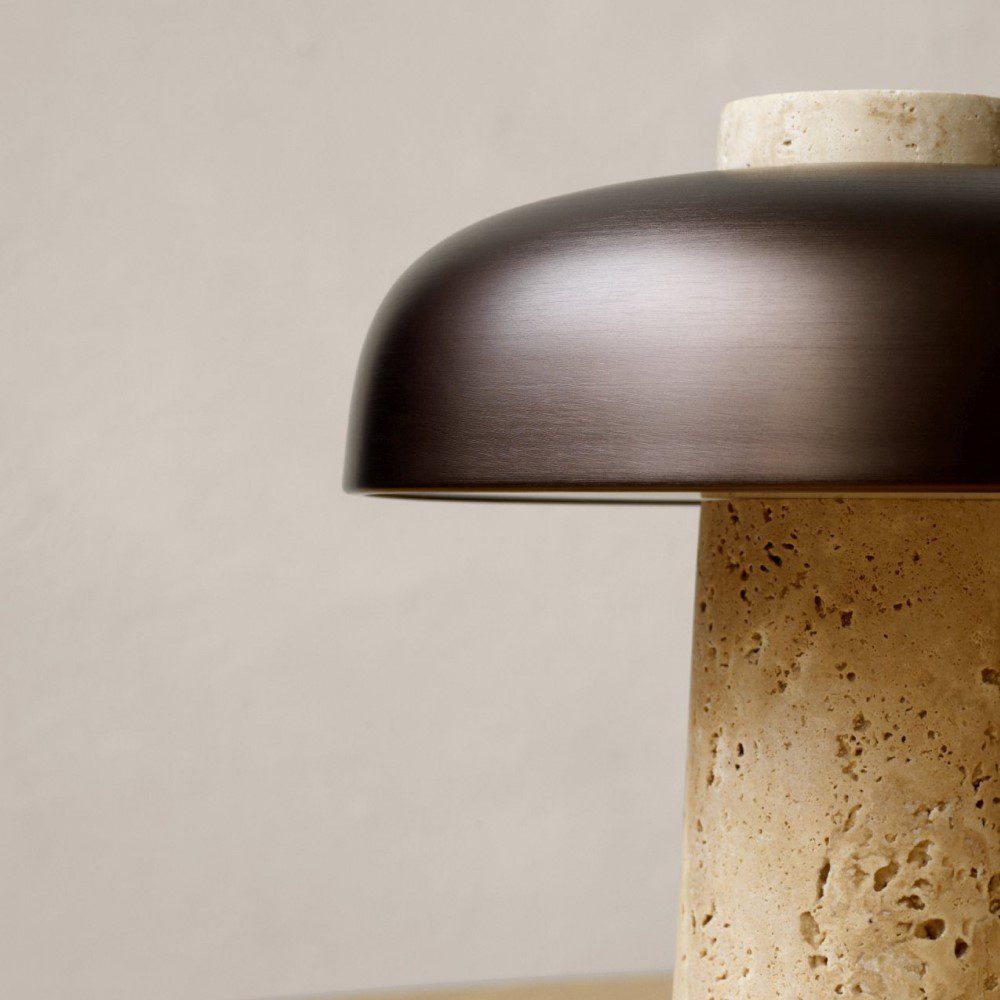
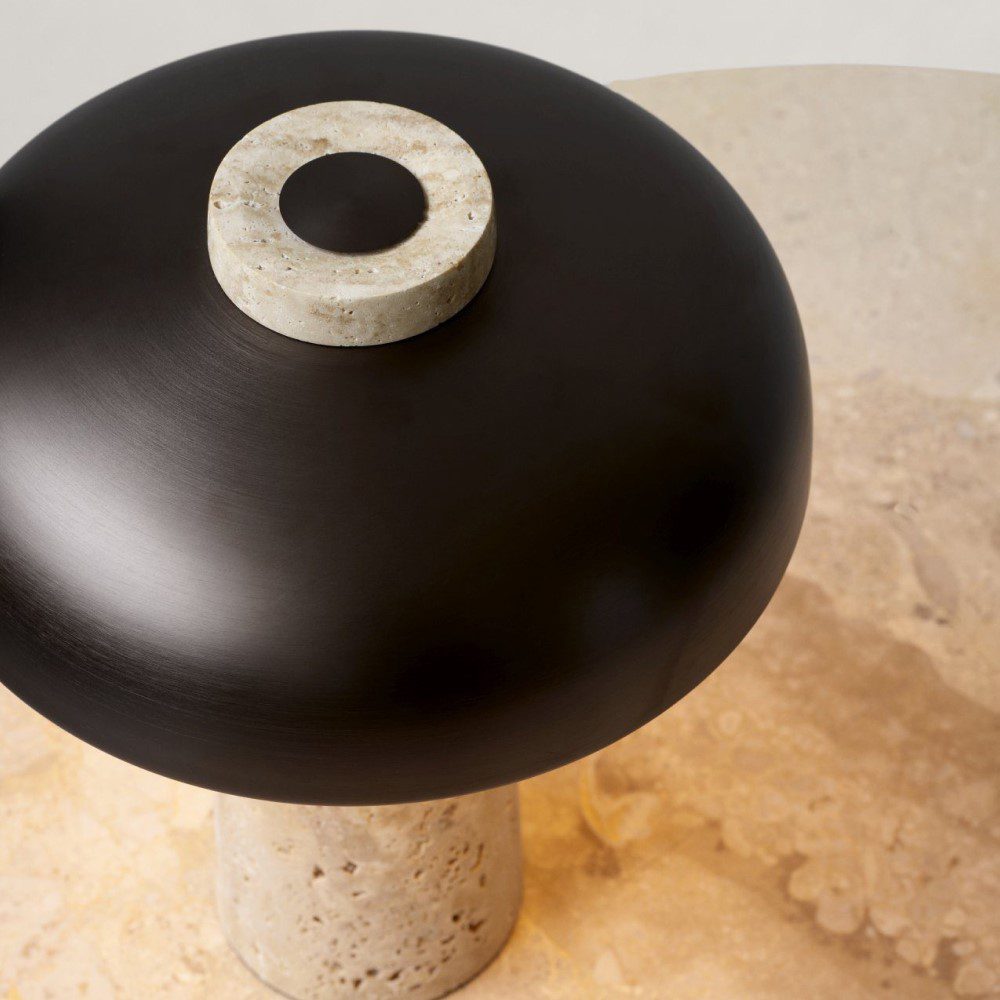
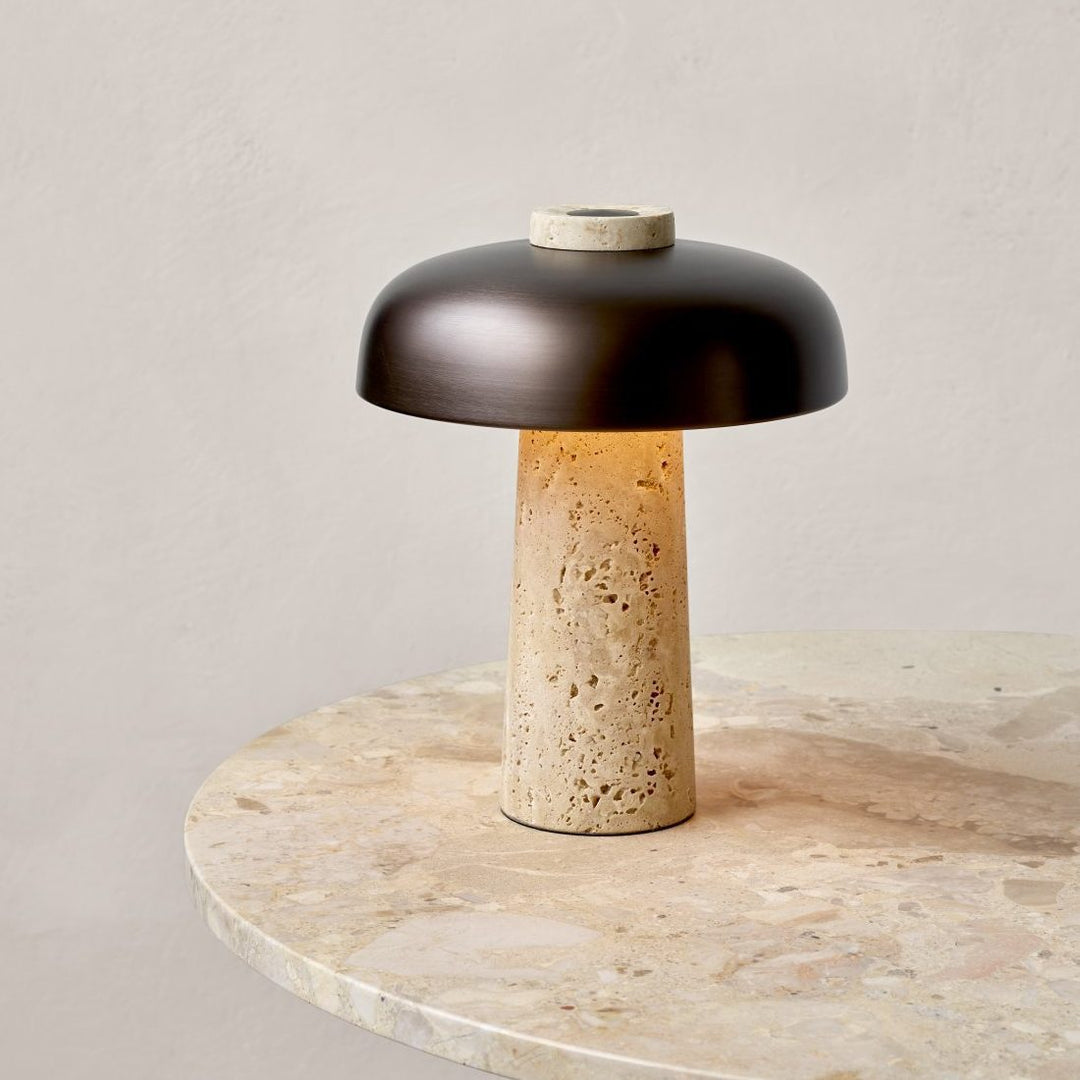
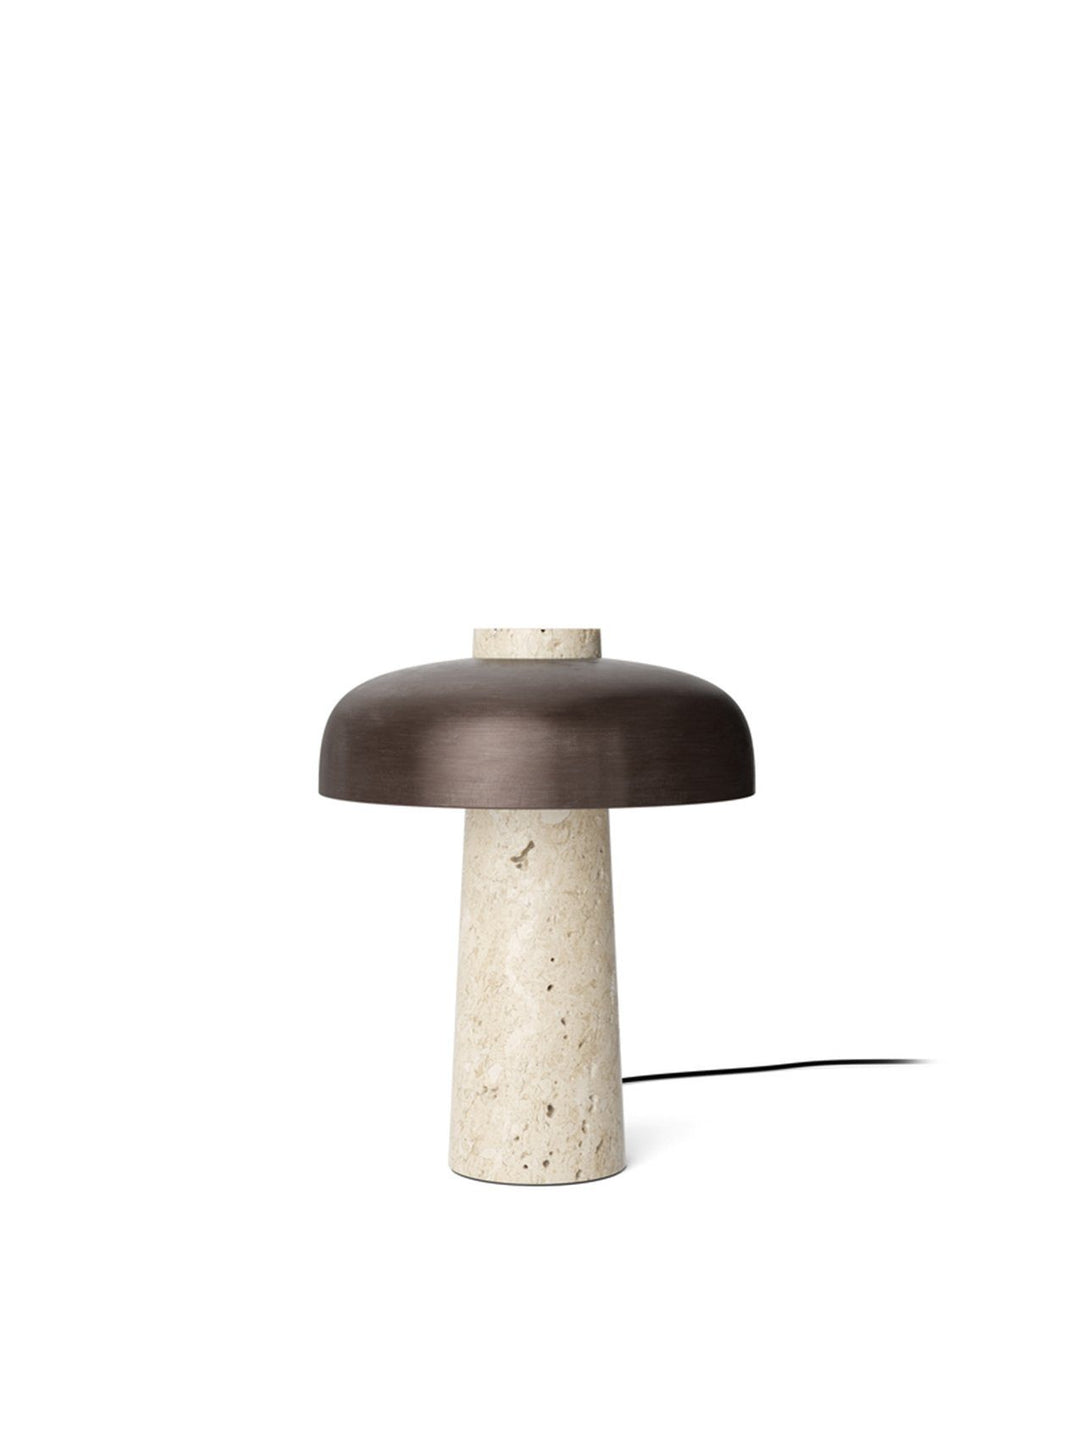
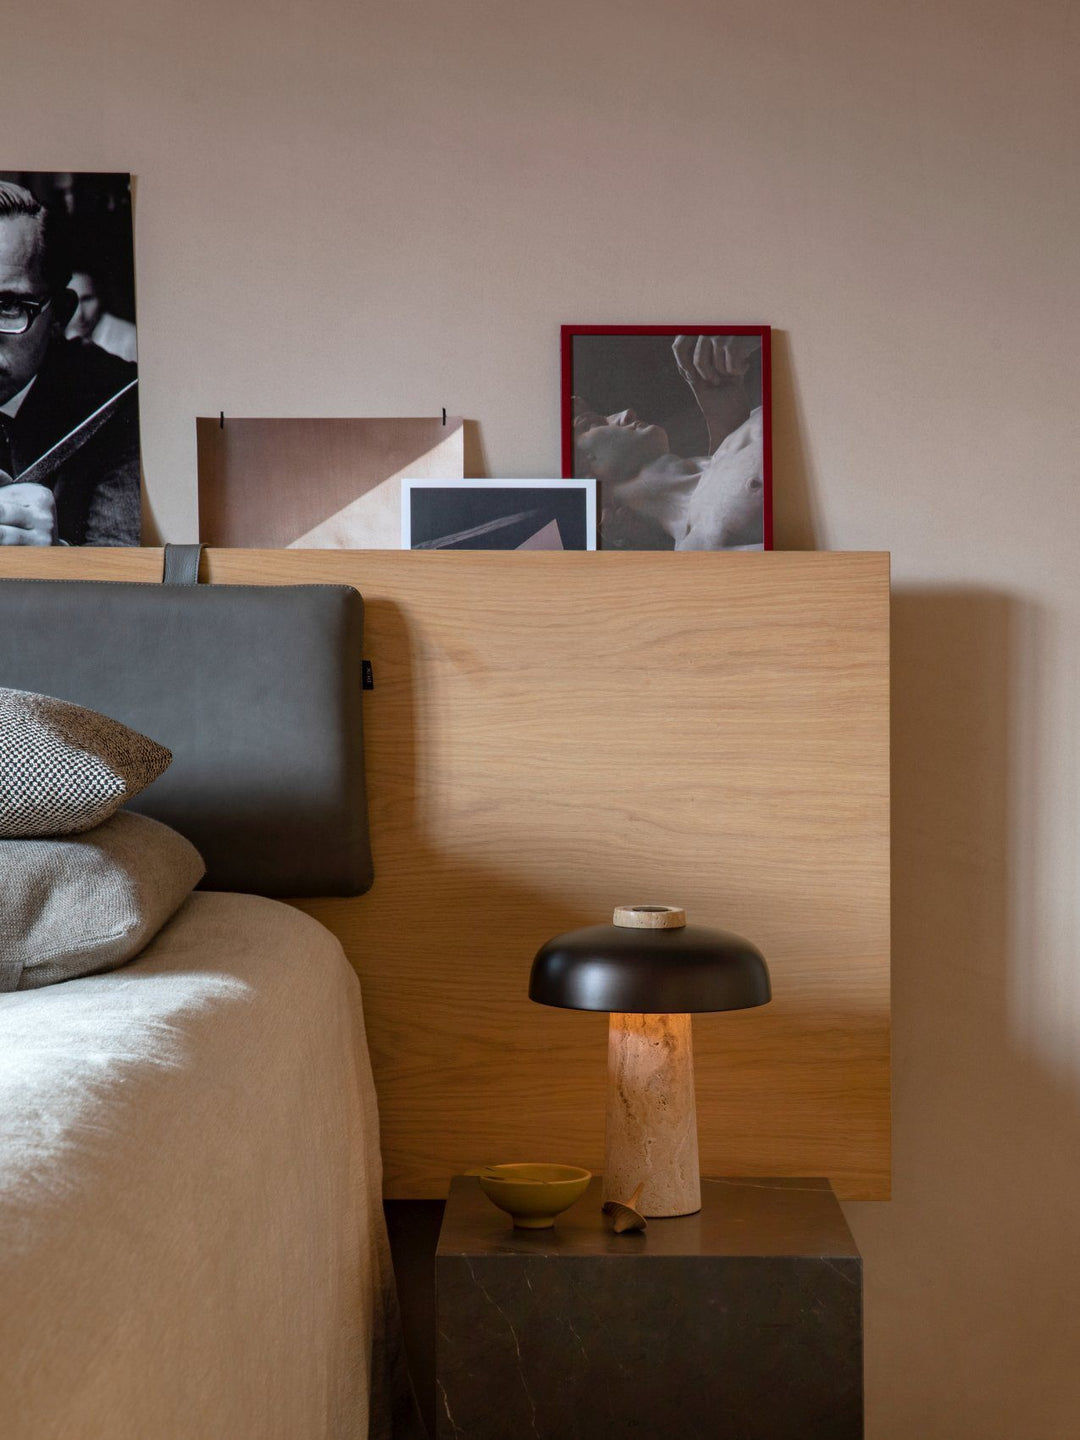
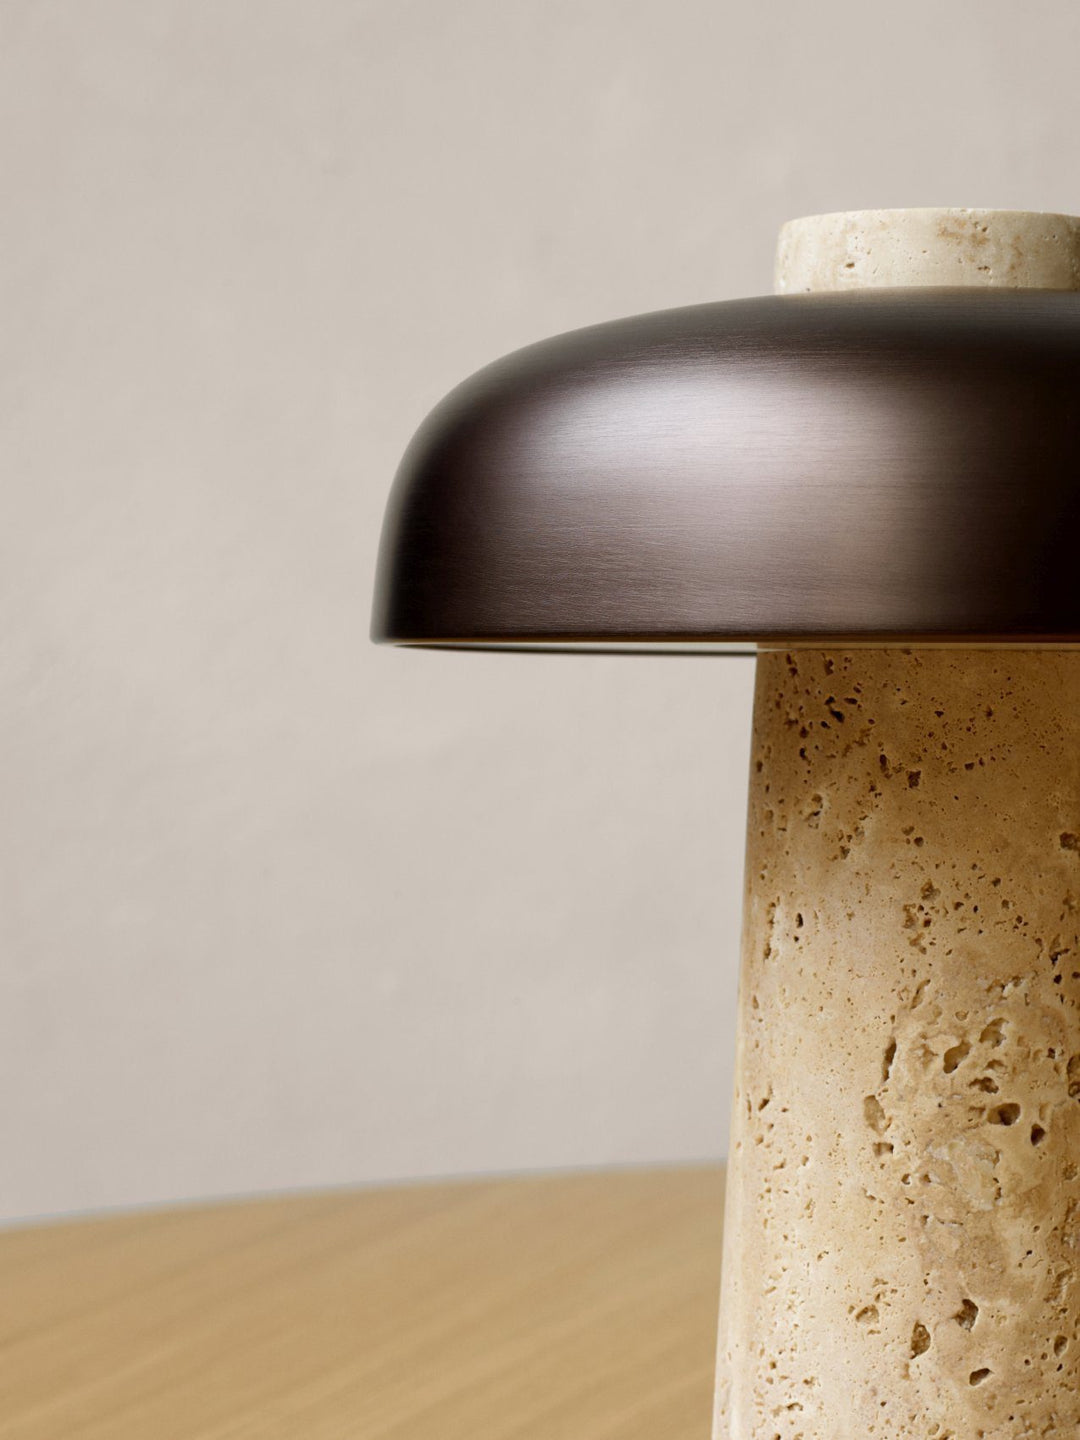
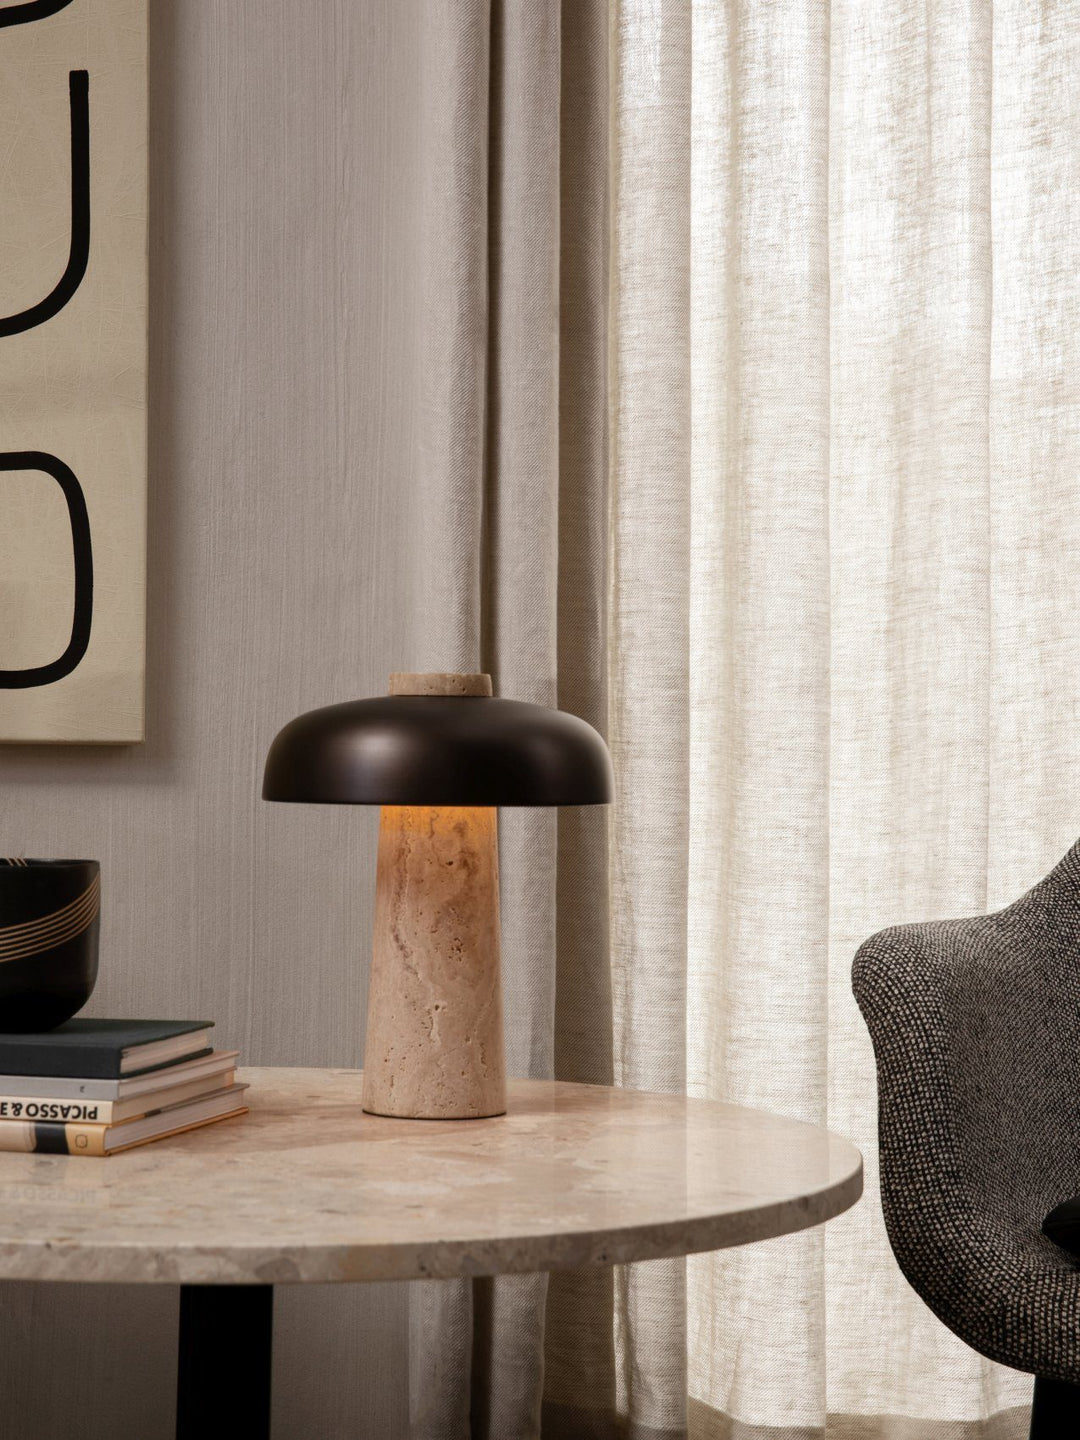
In his search for simple and clever solutions in any given space, Danish designer Aleksandar Lazic looked to Italian marble tables from the 1970s when creating the Reverse Lamp. Inspired by the play on structure created by geometric constraints, the conical travertine base and curved, bronzed aluminium shade define the lamp’s perfectly balanced expression.
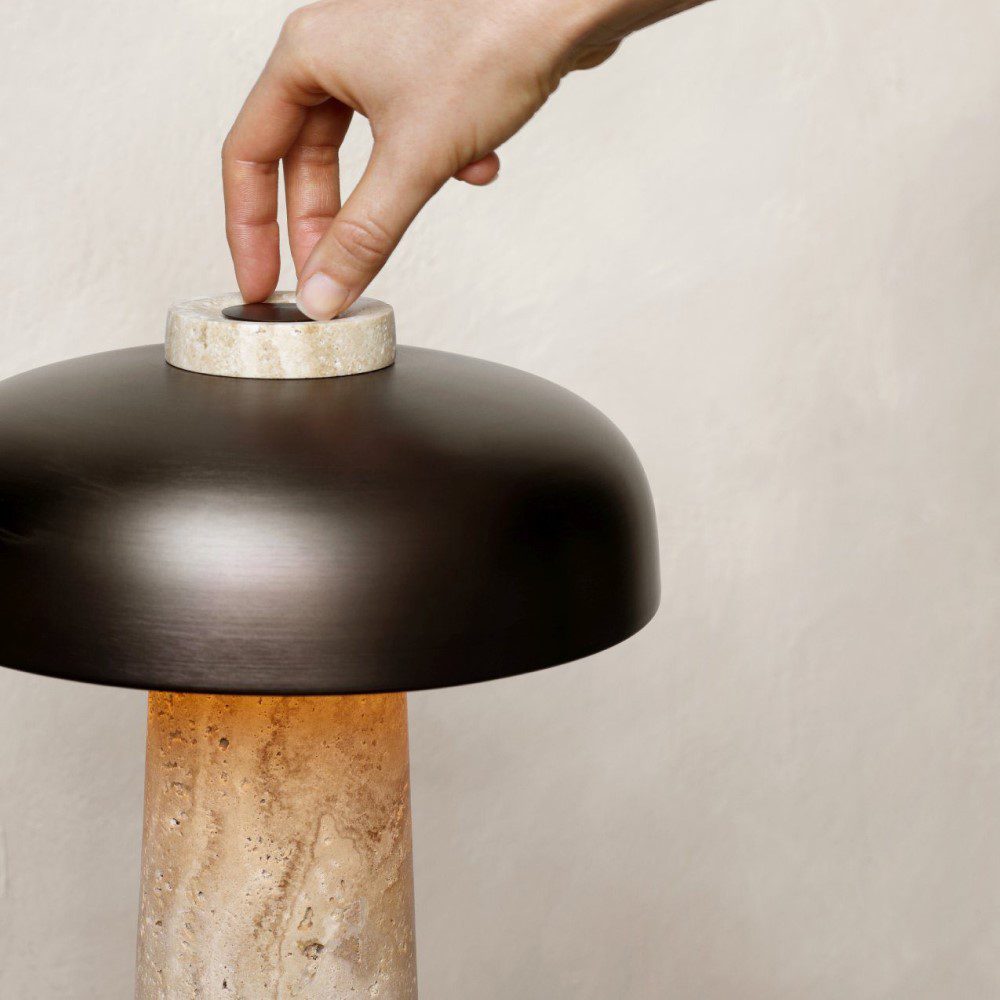
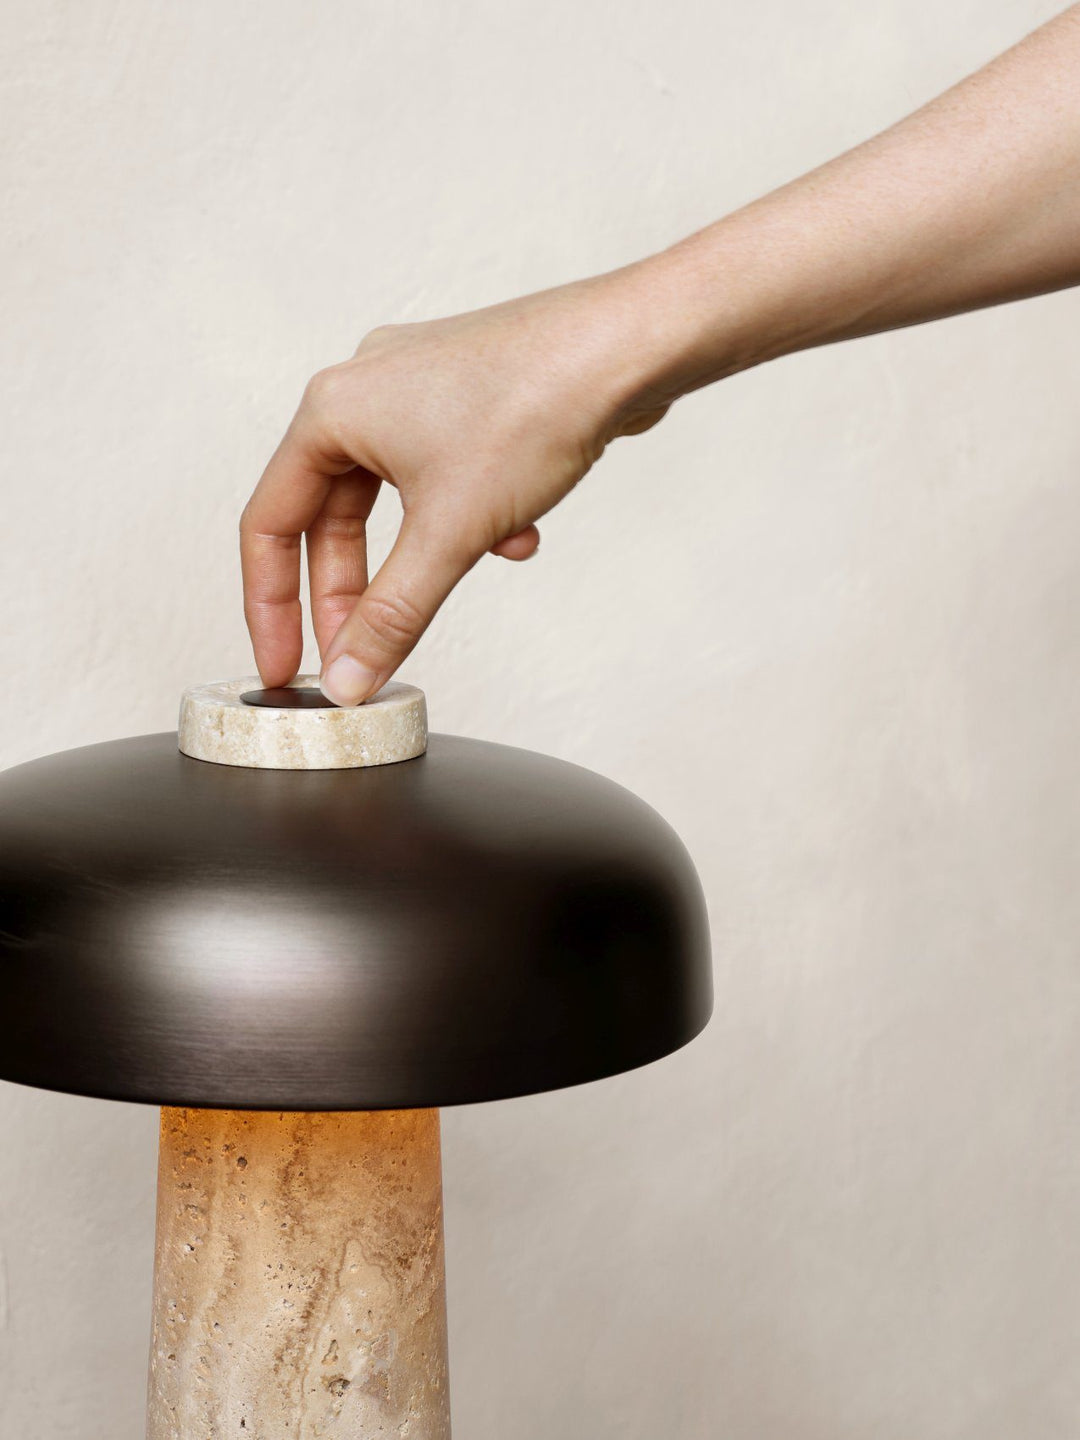
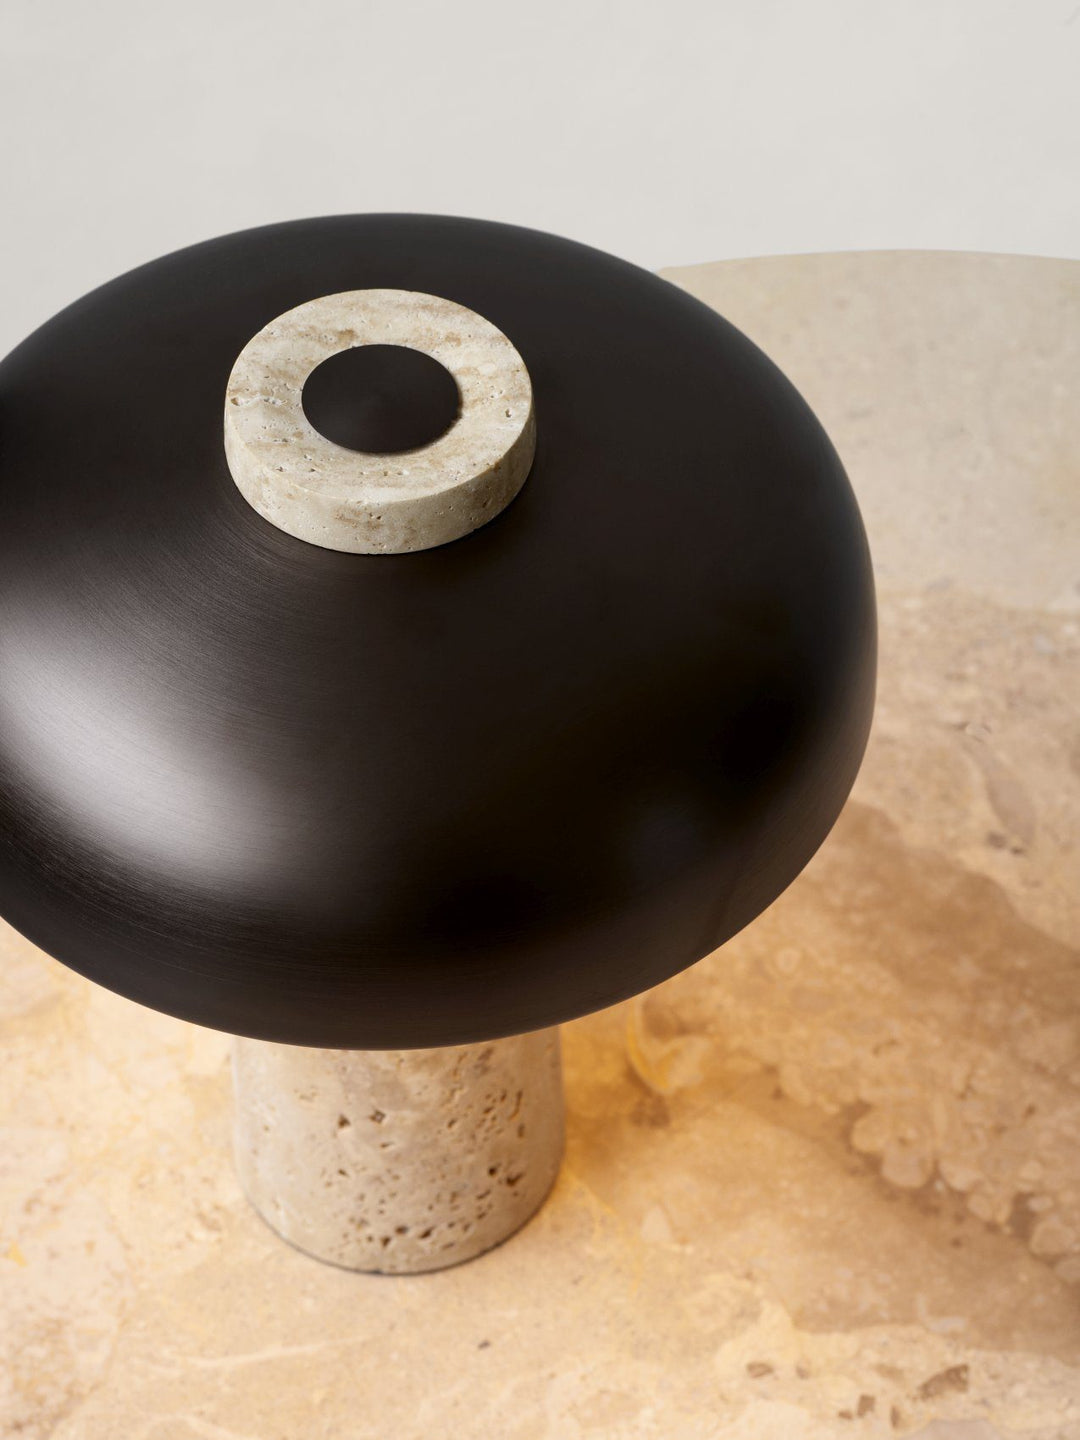
The light diffuses evenly across the unworked stone, left raw for the light to highlight its natural imperfections, revealing shadows and an intriguing colour play stemming from the base itself. At precisely the point at which the shade and base meet sits a dimmer switch for adjusting the light intensity.
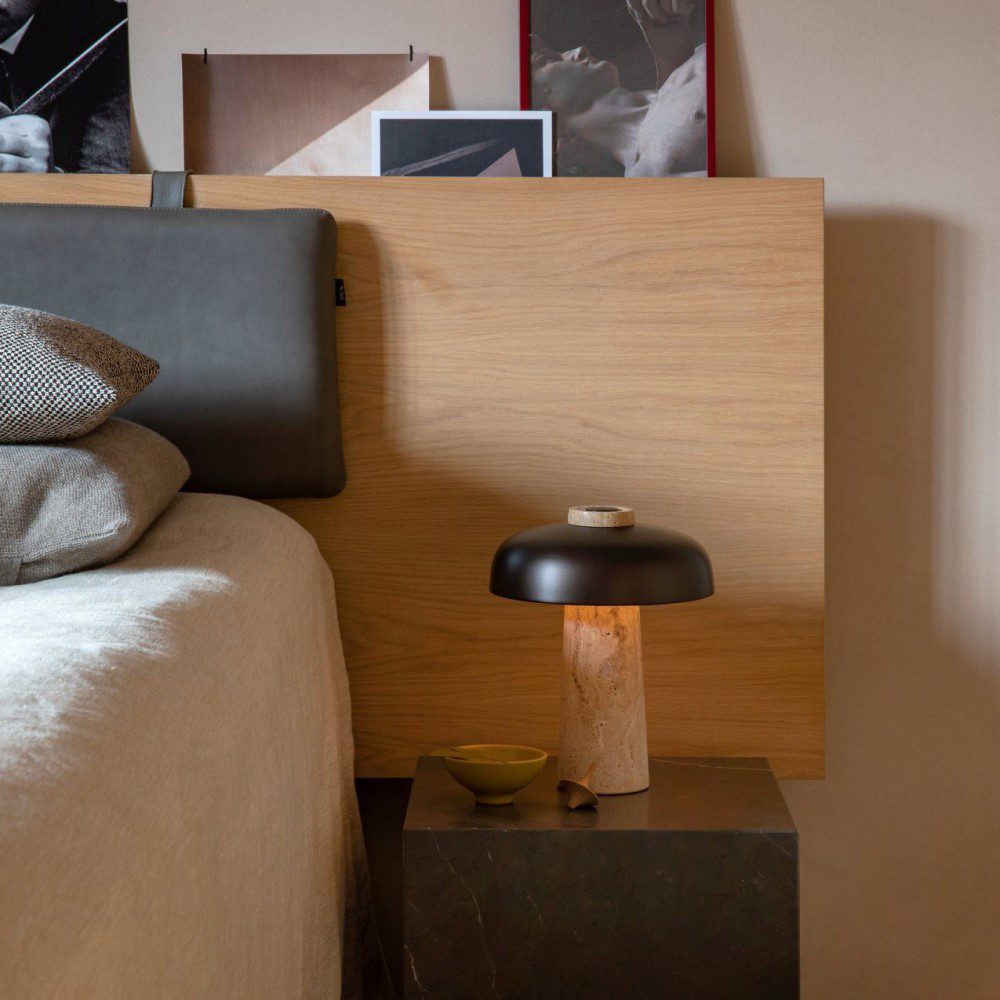
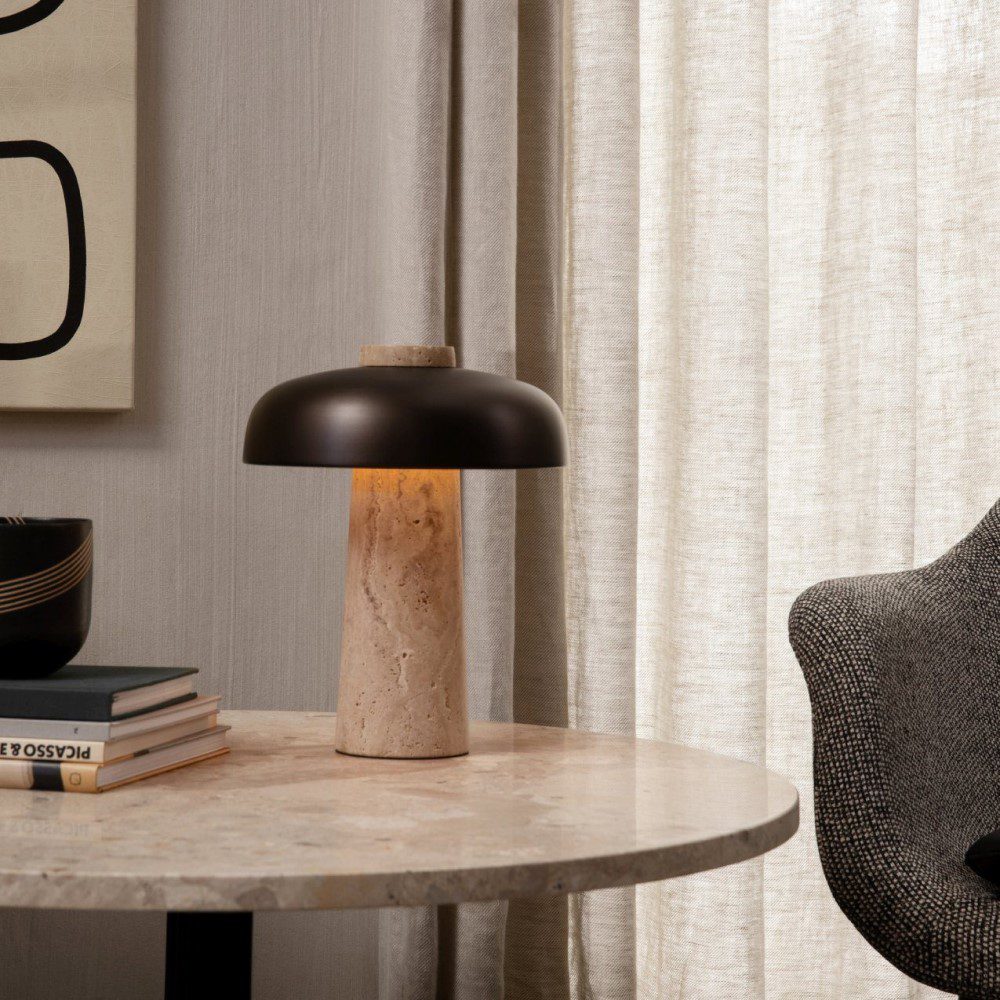
Fitted with a dim-to-warm LED light source, the Reverse Lamp casts warm light on a bedside table or subdued light on a cabinet surface, making it an elegant and characterful solution to a multitude of lighting needs.
Product information
Dimensions: (H) 30 cm, Ø 24/10 cm
Cord: 200cm
Dimming: Controlled on top of shade, dim-to-warm, 2200k - 3000k, 560lm Max
Electrical: 6W LED Panel, CRI >85
Materials: Travertine stone, Aluminum, PMMA diffuser, Adapter
MENU and BY LASSEN, two prestigious design houses have united to create a brand new luxury brand, AUDO COPENHAGEN. Read more about the rebranding here: https://www.designstuff.com.au/blog/audo-copenhagen-launches/
Additional resources:
Product Fact Sheet
AUDO COPENHAGEN is born of collaborative spirit. Developed from uniting MENU, The Audo and by Lassen, Audo Copenhagen reflects both a century of Danish design tradition and a modern, global outlook that is continually expanding and evolving. The furniture, lighting and interior accessories are shaped by purposeful details, high-quality materials and human needs, going hand-in-hand with the brand pursuit to create strong, long-lasting connections and partnerships.
Free Shipping on Orders Over $175
Free standard shipping Australia-wide on orders over $175, excluding bulky items.
Parcel Post Collect, Express Delivery and Click & Collect (Moorabbin, VIC) are also available. Learn more.
Next Day Dispatch
Orders are dispatched within 1 business day, excluding pre-orders and promotional periods.
Parcel Post Collect
Parcel Post Collect lets you send your order to a nearby Australia Post location – like a Post Office or 24/7 Parcel Locker – instead of your home. It’s a handy option if you’re not home during the day. You’ll get a notification when it’s ready to collect.
Easy 30-Day Returns
Changed your mind? Returns can be requested within 30 days of delivery. A flat $10 return fee applies to standard returns and will be deducted from your refund. Bulky items must be returned at the customer’s expense.